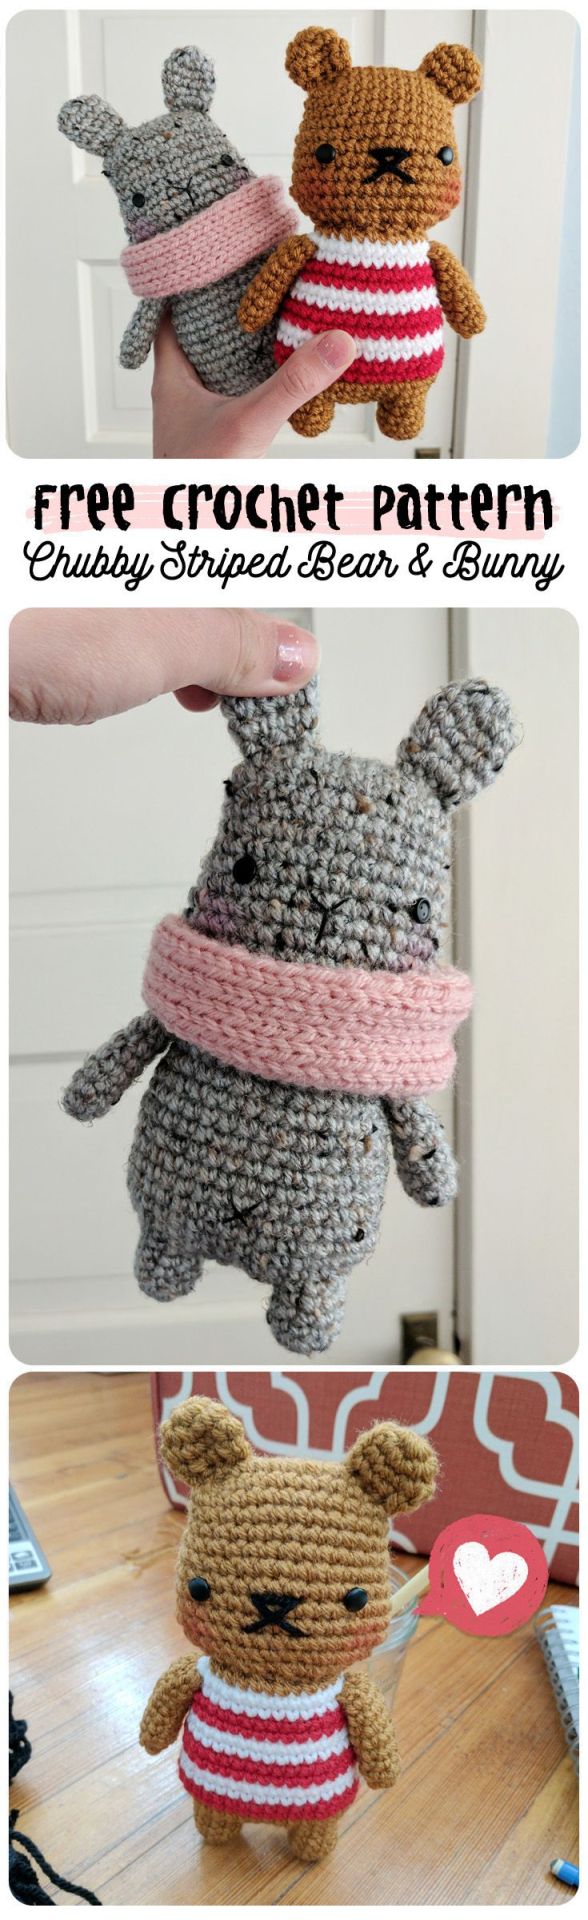
Free Crochet Pattern: chubby striped bear amigurumi (and bunny!)
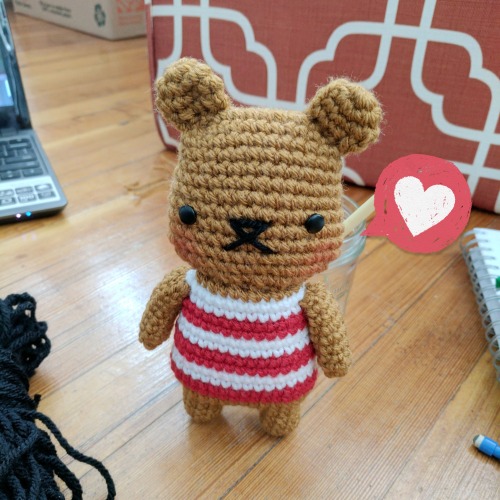
Alright, time for a new crochet pattern! This time it’s for this cute little striped bear, which is actually a revamp of an old pattern from maybe 5 years ago.
Unfortunately I can’t find any pictures of it, but this new version is way cuter anyway!!

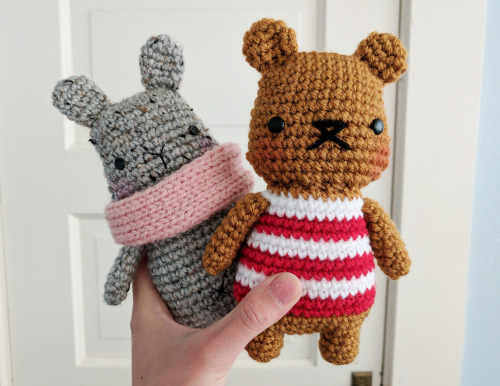
I made 2 different critters with this pattern & they’re identical except for color changes and the ears. Let’s get started!
Supplies
- ww yarn in 3 colors for the bear, or 2 colors for the bunny. [I used vanna’s choice, but any ww yarn you have will work!]
- 3.25mm hook* [you can use a slightly larger hook, your animal will just be a little bigger than mine. I’d love to see someone use super bulky yarn and a big hook!] (*affiliate link)
- stuffing [polyfill, yarn & fabric scraps etc]
- yarn needle
- yarn or thread for nose & mouth
- eyes [buttons, brads, felt, french knots etc. I used some scrapbooking brads from michaels.]
- chalk pastels & brush for blush [optional]
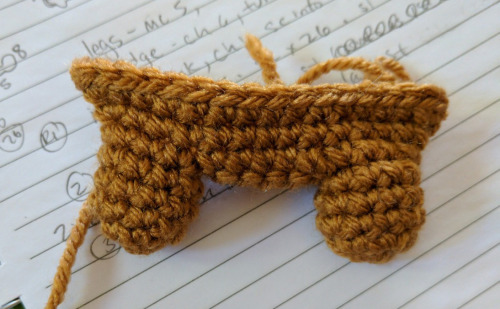
To start, we’ll make the legs and the leg connector, then turn them into one piece and crochet in the round up to the neck.
First make these 3 pieces.
Legs (make 2)
Make a magic ring of 5 sc
R1: 2sc into each st (10)
R2-R4: sc into each st (10)
Finish off. No need for a long tail.
Leg connector (make 1)
Chain 5
R1-R2: ch1 turn, sc x 5
Finish off. Use the short tail on each side to sew to the legs.
Sew the connector to the legs using up 2 stitches of each leg. Tie the leg tail and connector tails in a double knot. Once both sides are done, insert your hook and pull up a loop on either the left or right side. You can leave the extra tail lengths on and use them as stuffing.
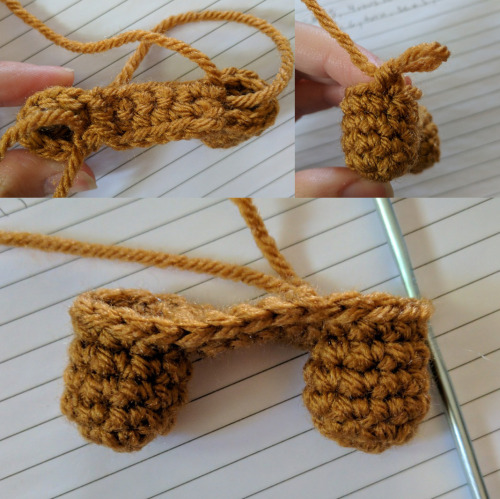
So you should have 8st for each leg and 5st on the connector, like this:
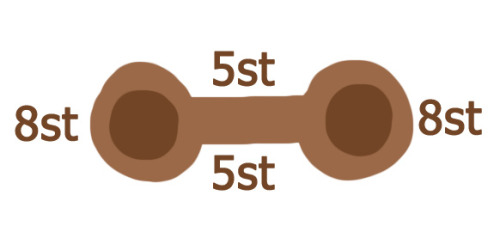
Yes, that is a quality graphic right there. 8)
Body
R1: Okay, so you’ve drawn up a loop. Ch1, then sc into the same st. That sc is your first st. Now sc around your piece 25 more times and sl st into the first st. (26)
Start and end every row this way, with a ch 1 & sc into the same st as your first st, and sl st into it to finish the row.
If you’re doing the all-one-color version, you don’t need to do the sl st stuff, ignore it and you can just crochet endlessly in the round.
From now on, when you do increases, it will be on the side of your animal, as determined by flattening it down, so don’t stuff it until it’s done!
R2: do 2 increases on each side. Since you just started, your first and last stitch will both be an increase. (30)
R3: repeat R2 (34)
Switch to your first stripe color (A). Switch on the last yarn pull over on the last sc of R3. [here’s a video tutorial if you need one]
R4-R5: sc into each st with A
Switch to 2nd stripe color (B)
R6-R7: sc into each st with color B
Switch to A
R8-R9: sc into each st with A
Switch to B
R10: do 1 decrease on each side (32)
R11: sc into each st with color B
Switch to A
R12: do 1 decrease on each side (30)
R13: sc into each st with color A
Switch to B
R14: do 1 decrease on each side (28)
R15: sc into each st with color B
Switch back to bear color
R16: do 1 decrease on each side (26)
Finish off. You don’t need to leave a tail.
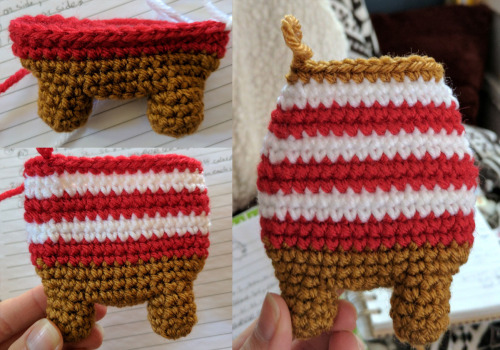
Now you can add stuffing! So cute!
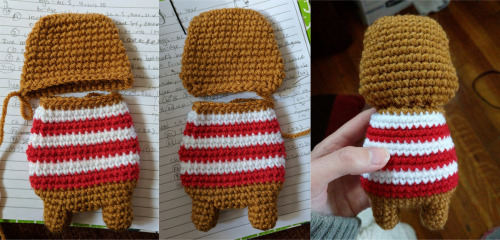
Head
Ch 10
R1: ch1 turn, sc in the next 9 st. 3sc into the 10th. Continuing around the other side of your starting chain, sc into the next 8 sc, and 2sc into the 9th. (22)
From now you’ll do increases the same way you did the body, on the sides, flattened down. You don’t need to join rounds, so use a stitch marker and just keep going.
R2: do 1 increase on each side (24)
R3: do 2 increases on each side (28)
R4-R5: sc into each st (28)
R6: do 1 increase on each side (30)
R7: sc into each st (30)
R8: do 1 increase on each side (32)
R9: sc into each st (32)
R10: do 1 increase on each side (34)
R11: do 1 increase on each side (36)
R12: do 3 decreases on each side [find the middle 6 st on each side] (30)
R13: do 2 decreases on each side (26)
Finish off. Leave a long tail to sew to the body. Add stuffing. Add the face now, or after you’ve sewn the head it to the body. Your choice. Be sure to add lots of stuffing to plump out those cheeks! When you’re nearly done sewing, stop and add more stuffing to the body and head.
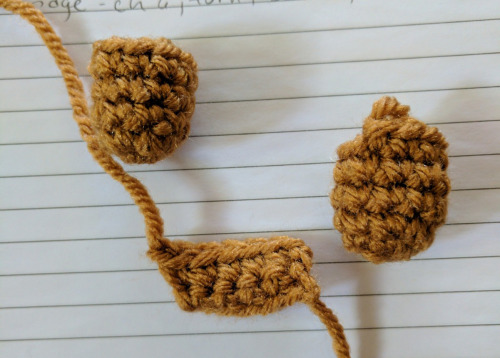
Bear ears (make 2)
Make a magic ring of 6sc
R1: 2sc into each st (12)
R2:sc into each st (12)
R3: *sc, dec2tog* repeat til end of row (8)
Finish off, leave tail for sewing to head. Don’t stuff.
Bunny ears (make 2)
Make a magic ring of 6sc
R1: 2sc into each st (12)
R2-R3: sc into each st (12)
R4: *sc x 2, dec2tog* repeat til end of row (9)
R5: sc into each st (9)
Finish off, leave tail for sewing to head. Don’t stuff.
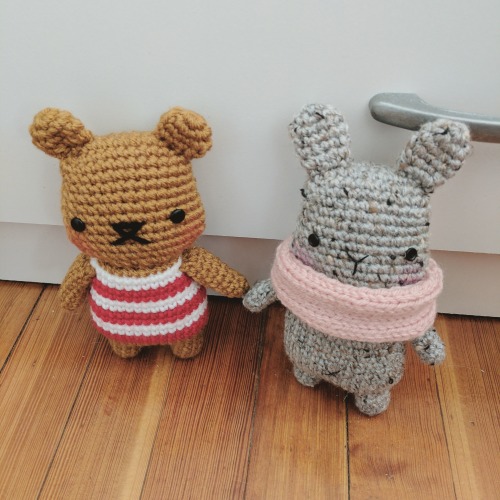
For the nose & mouth on the bear I used ww yarn, and for the bunny I used regular thread.
Arms
Make a magic ring of 6sc
R1: *sc x 2, 2sc* repeat (8)
R2-R8: sc into each st (8)
Finish off. Leave tail for sewing onto body. Don’t stuff, but do shove the starting tail into the bottom of the arm to lightly plump the hand.
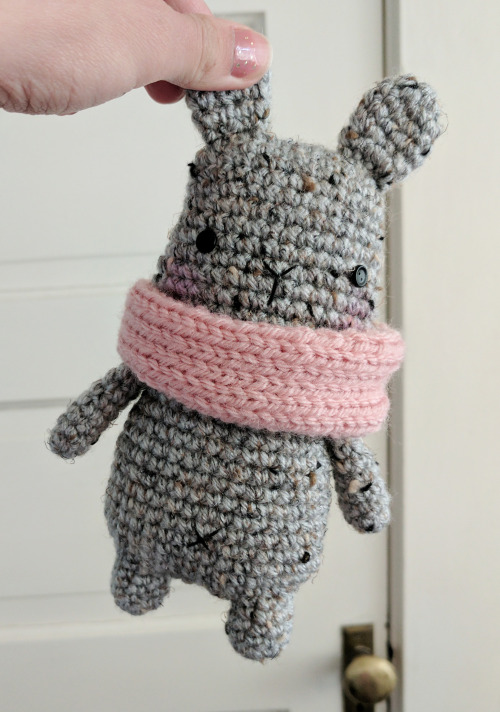
For the bunny’s little scarf/cowl, I knit on 5mm needles, 9 stitches by…however many rows until it was long enough. Haha sorry, I didn’t count. Use whatever scarf pattern you like, knit or crochet!
When the face is done, dust a little bit of pastel on the cheeks! You could crochet a tiny blush-colored circle and sew that on instead, too. Or use felt!
That’s it for the pattern! I hope you guys like it! Tag me on instagram (hellohappycrafts) if you make it :D