- Ask or tell me anything
- Submit a post
- Website
- Shop
- Archive
-
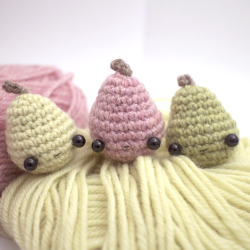
Kawaii bee amigurumi pattern
Update 25/04/2019: There’s an updated version of the bee pattern, with lots of better photos, over on my new blog!
The little amigurumi bee is quite simple to make, so here is a free pattern for you.
Difficulty: easy
Size:
Using medium (worsted) weight yarn and a 3.5mm (E) crochet hook, your bee should be about 5 cm / 2″ long. However, exact gauge isn’t important.Materials and tools:
• Yellow, black, and white yarn
• Crochet hook
• Stuffing
• 6 mm black beads for eyes
• Black thread (for sewing eyes and mouth)
• Tapestry needle and a smaller sewing needleAbbreviations:
• ch = chain
• sc = single crochet
• sc2tog = single crochet 2 togetherPattern:
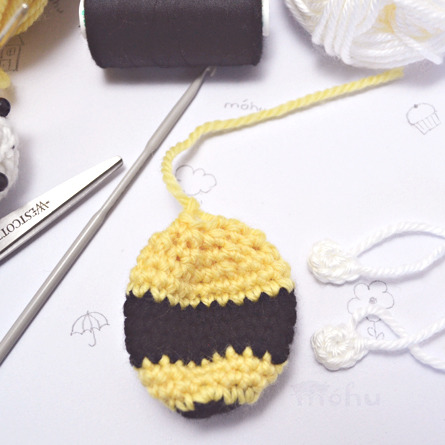
The little bee is worked in the round, without joining rounds. Start with a magic ring, or ch 2 and work in the first chain.Body:
1. Using black yarn, 6sc in a circle.
2. 2 sc in each sc around. (12 sc)
3. Using yellow yarn, (2sc in next sc, 1 sc in next sc) 6 times. (18 sc)
4. (sc in next sc, 2 sc in next sc, sc in next sc) 6 times. (24 sc)
5. sc in each stitch around. (24 sc)
6-9. Using black yarn, sc in each stitch around, for 4 rounds. (24 sc per round)
10-11. Using yellow yarn, sc in each st around, for 2 rounds. (24 sc per round)
12. (sc in next sc, sc2tog, sc in next sc) 6 times. (18sc)
13. (sc2tog, sc in next sc) 6 times. (12 sc)
14. sc2tog around. (6sc)Cut yarn, leaving a tail for sewing, and finish off. Fill the body with enough stuffing to make it nice and squishy, then sew the hole closed.
Wings (make 2):
1. 6sc in a circle, but don’t join the circle. This will leave a flatter edge on one side of the wing.
Cut yarn, leaving a long tail for sewing, and finish off.
Sew the wings to the top of the bee, using the pictures as a guide. The flat side of the wing goes against the body. The wings should be in the middle of the black stripe, and roughly 2 stitches apart.
Face:
Use black thread to sew a face onto your bee, using the photos as a reference. The eyes should be level with the middle of the face.
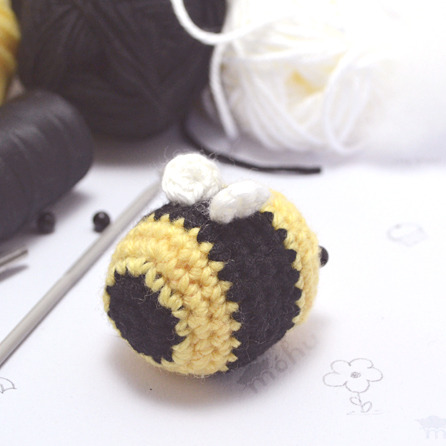
That’s all! Now you can put your little bee on your desk or in your pocket, throw him around, or give him to a friend. Here’s a quick video of a bee being made (click to play).
If you have any questions, let me know in the comments at the bottom of this post. I’d love to see your finished projects too! Share your photos with me on Instagram using #mohumohu (^-^)/
For information on copyrights and selling your finished amigurumi, look over here: copyright information.
-
winniexox liked this
flutterbyfairy liked this
hanthebanan liked this
 prettypangolins liked this
 sojourntime liked this
 joysoko liked this
 rosemary-butch liked this
 briocheboye liked this
  ithrowarttutoshere reblogged this from mohustore
 lilianamigurumi reblogged this from mohustore
foreverinasweetunrest liked this
- sarahisalright reblogged this from stitchforgood
- sarahisalright liked this
 littlemsconceited liked this
  lipstickcovered-uzi liked this
 crochetcroshit reblogged this from mohustore
valeria--studies liked this
heyitsannana liked this
llemoncello liked this
 spyritevesta liked this
 yukiru liked this
b-elizabeth-not-brassica liked this
littlecreekhoney liked this
ladybug-djm liked this
 cakemakethme liked this
 nostalgicountry reblogged this from ewebie
punksergeant reblogged this from ewebie
coiponds liked this
pukajen liked this
slorpjuice liked this
 vi0linda liked this
 thats-what-people-brew liked this
 thewanderingfound reblogged this from fuck-off-watson
 - thewanderingfound liked this
youfoolishlyfoolishfools reblogged this from timey-wimey-drew
boome01 liked this
timey-wimey-drew reblogged this from fuck-off-watson and added:
I HAVE ONE
former-fandom-trash liked this
- fuck-off-watson liked this
mohustore posted this
- Show more notes
-
Related posts
-

Making woolly creatures at mohumohu.com.
shop • blog
newsletter signup
![Kawaii bee amigurumi patternUpdate 25/04/2019: There’s an updated version of the bee pattern, with lots of better photos, over on my new blog!
The little amigurumi bee is quite simple to make, so here is a free pattern for you.
[[MORE]]
Difficulty:...](https://64.media.tumblr.com/71b49988decedb6768e68c058015c8f5/tumblr_mpsbseexnO1reogbdo1_r1_100.jpg)